This is the whole path from a fresh install to a live campaign on your product page, in the order you will actually click it. It takes about ten minutes the first time. Two steps trip people up, and both are called out below so they do not cost you an afternoon.
1. Open Fundcap
In your Shopify admin, find Fundcap under Apps in the left sidebar and click it. You land on the Fundcap home page with an At a glance panel (running campaigns, campaigns funded, backers, raised). Click Manage campaigns, or Campaigns in the sidebar under Fundcap.
2. Start your free trial
Building campaigns is free. Taking one live needs an active plan, so on the Campaigns page you will see a banner: Start your 14-day free trial. Click Start free trial, and Shopify shows its own approval screen with the $19/month terms. Approve it there and you are returned straight to the Campaigns page, ready to go. You are not charged during the trial.
This is Shopify's standard billing screen, not ours. The charge is handled entirely by Shopify, and you can cancel any time by uninstalling.
3. Create the campaign
Click New campaign in the top right. A product picker opens: search for your product, tick it, and click Add. One campaign covers one product.
The campaign form then asks for four things:
- Goal type. Units backed (funded when a number of items are sold) or Money raised (funded when orders reach an amount). Units is the usual choice when a factory needs a minimum order quantity.
- Goal. The number to reach. There is more on picking it in how to price and set a crowdfunding goal.
- Deadline. A date. The campaign ends at 11:59 PM on that day in your store's time zone, and your buyers see a live countdown to it.
- Max cap (optional). The point where selling stops even if the campaign is flying. This is the funded AND capped idea: it goes to production at your goal and closes at your cap, so you never take an order you cannot make.
Leave All-or-nothing ticked unless you have a reason not to. That is the promise your buyers see: they are charged at checkout, and if the goal is missed by the deadline you refund every one of them in one click. Click Create draft.
4. Launch it
Your campaign now shows in the table with a Draft badge. Nothing is public yet, so this is a good moment to double-check the numbers. When you are happy, click Launch. The status flips to Live, the deadline column starts showing days remaining, and the widget turns on for your product page.
5. Make sure the product is published to your Online Store
This is the first thing that catches people out, especially on newer stores. If the product is not published to the Online Store sales channel, its page simply does not exist for shoppers and you get a 404, campaign or no campaign.
- Go to Products and open the product.
- In the Publishing panel on the right, click the edit icon.
- Turn on Online Store, click Done, then Save.
If the Publishing panel already says Online Store, you are fine, skip ahead.
6. Add the widget to your product page
The widget is a theme app block, so you place it once and Shopify removes it cleanly if you ever uninstall. On the Campaigns page, click Add the widget in the theme editor in the setup banner. That opens your theme editor on the product template.
- Click Add block (inside the product information section).
- Open the Apps tab and choose Fundcap Campaign.
- Drag it where you want it, usually just under the buy buttons.
- Click Save. This step is easy to forget, and without it the widget will not appear.
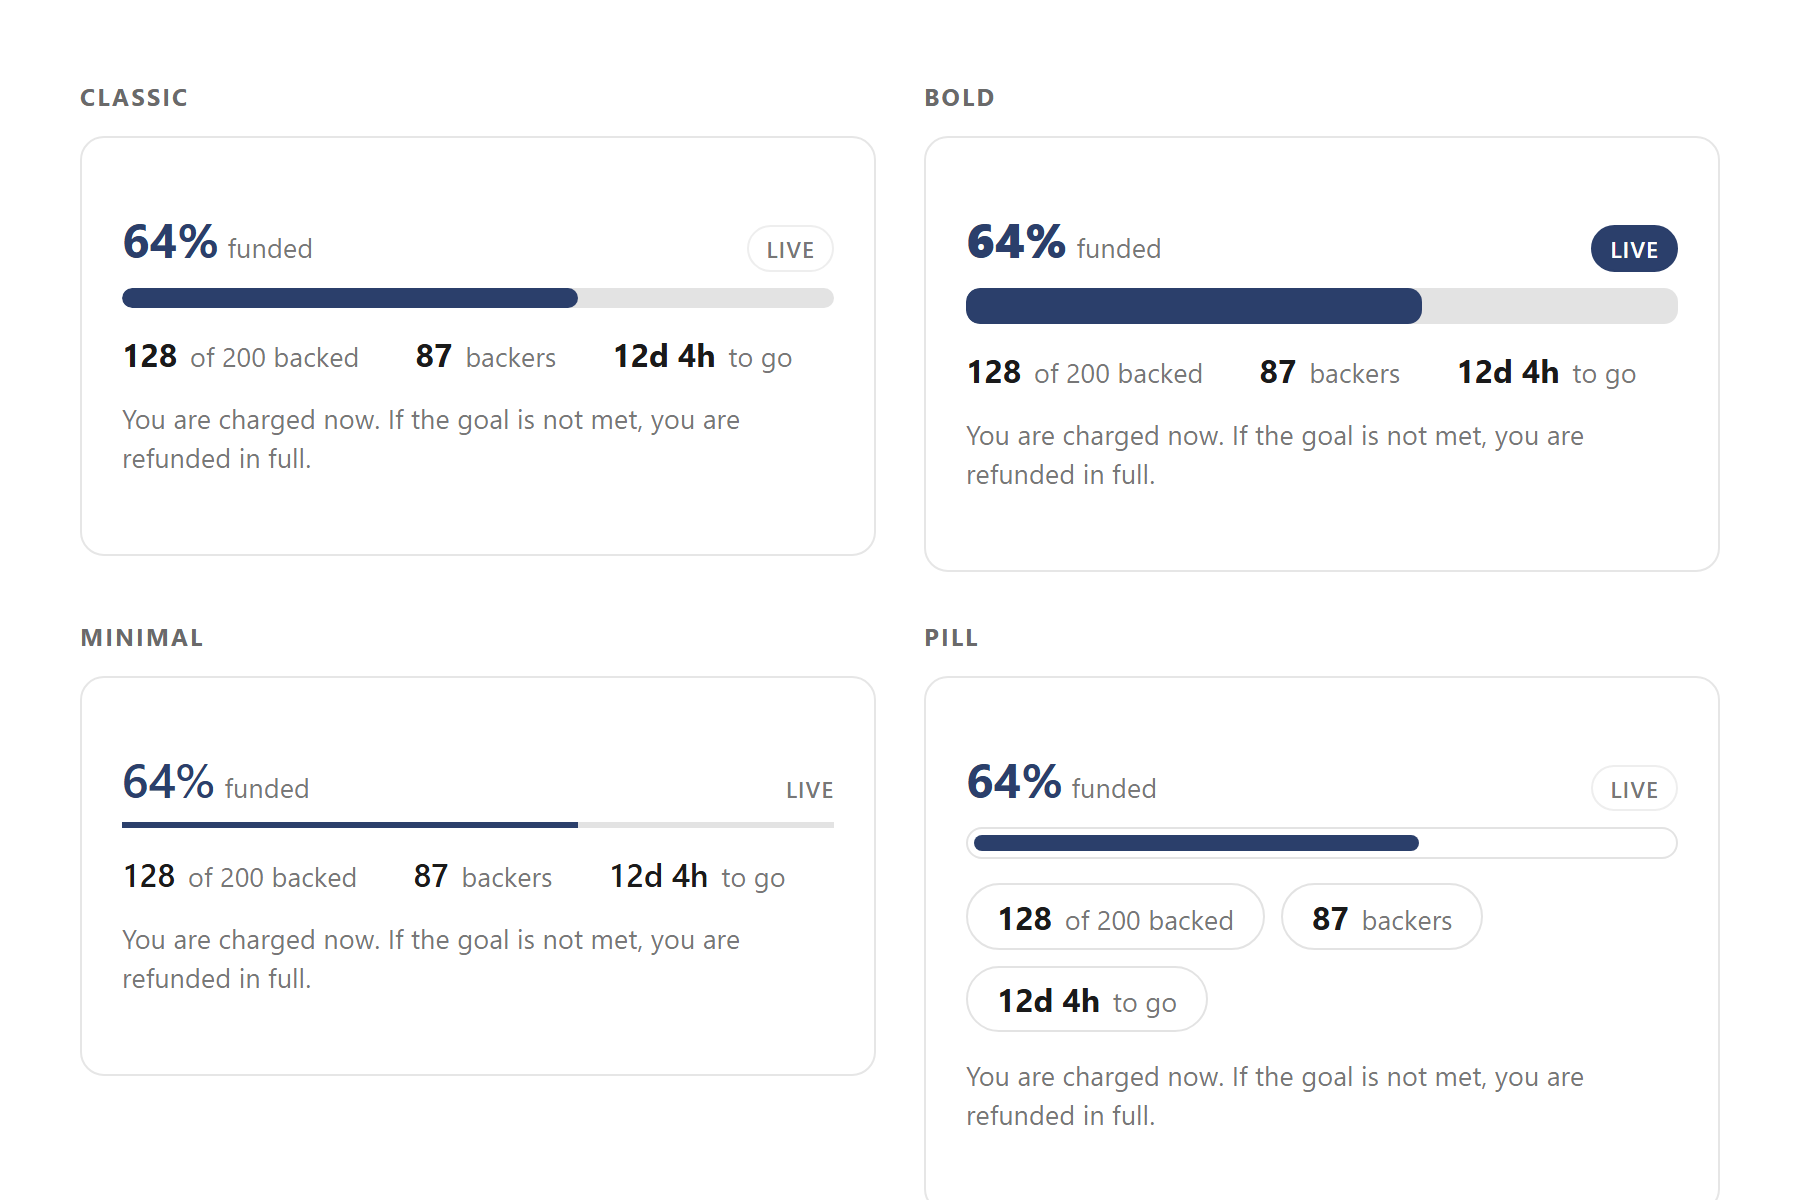
While you are there you can pick a style preset and an accent color. Full detail in add the Fundcap widget to your theme.
7. Check what your buyers see
Open your product page as a shopper. You should see a live campaign block: the percent funded, a LIVE badge, progress in the form of 0 of 200 backed, a backer count, a countdown like 21d 10h to go, and the promise line: You are charged now. If the goal is not met by [your date], you are refunded in full.
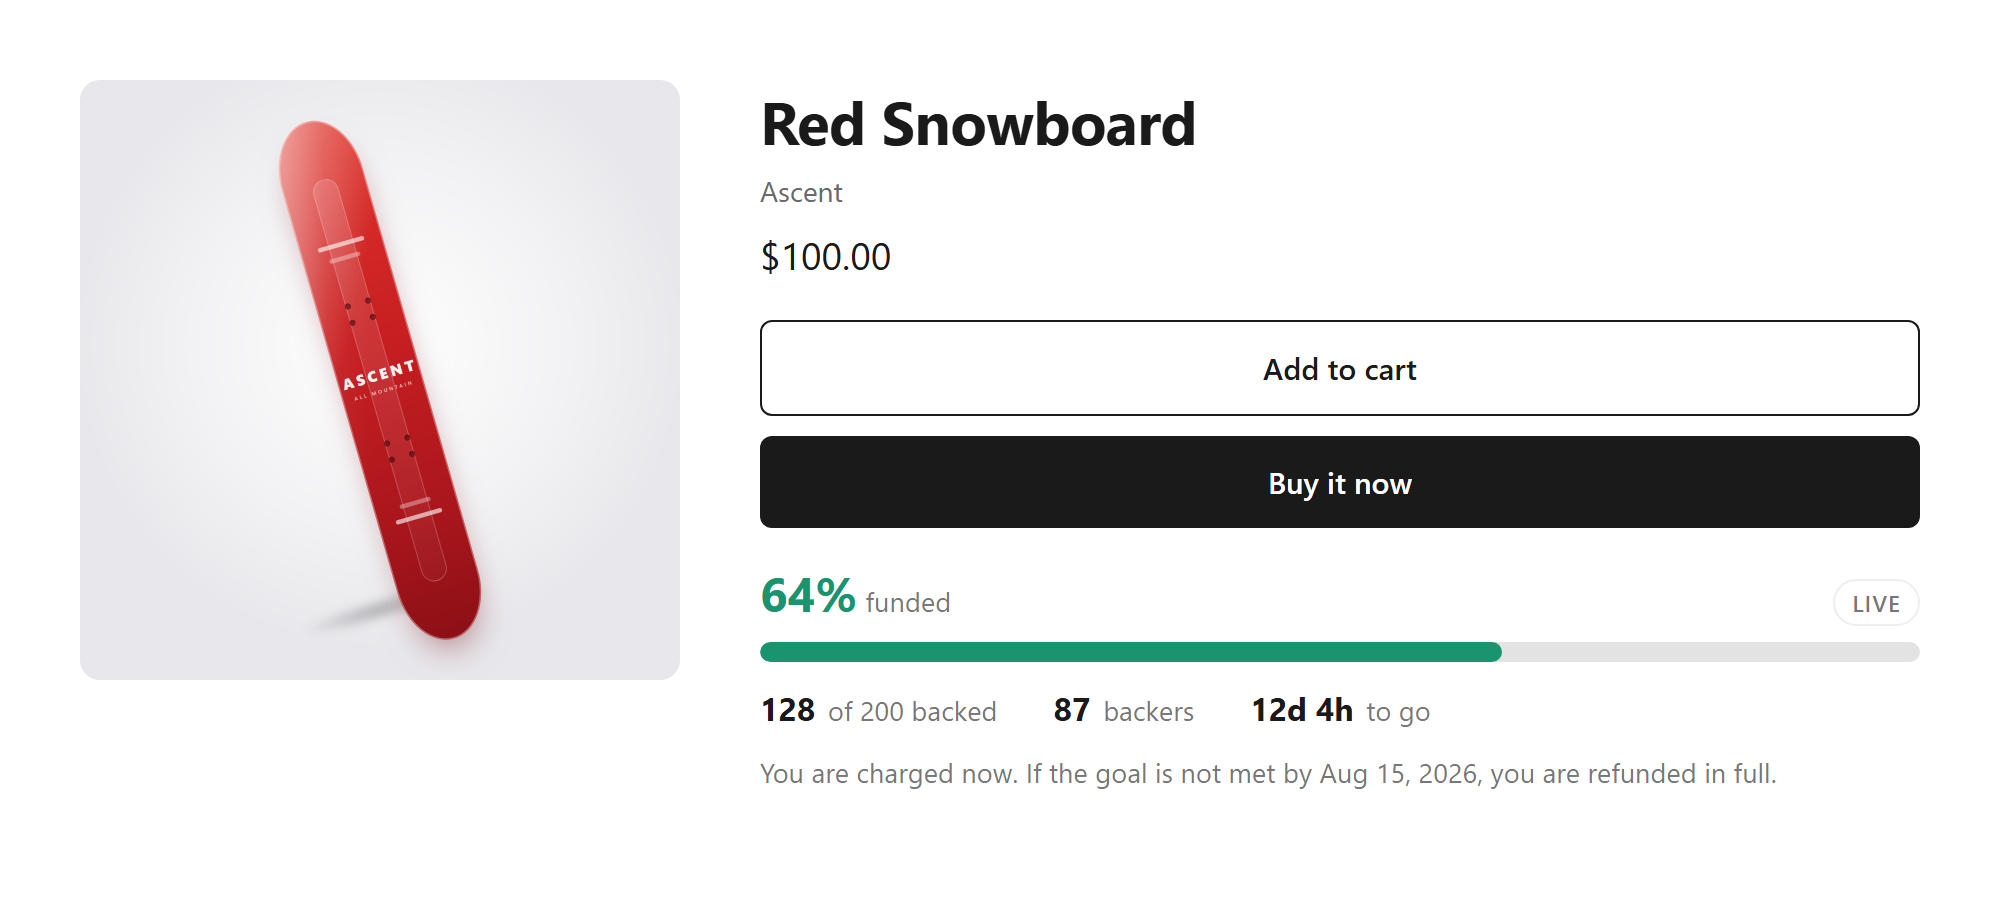
If nothing shows up, the cause is almost always one of the two steps above. Why is my campaign widget not showing walks through the rest.
8. What happens while it runs
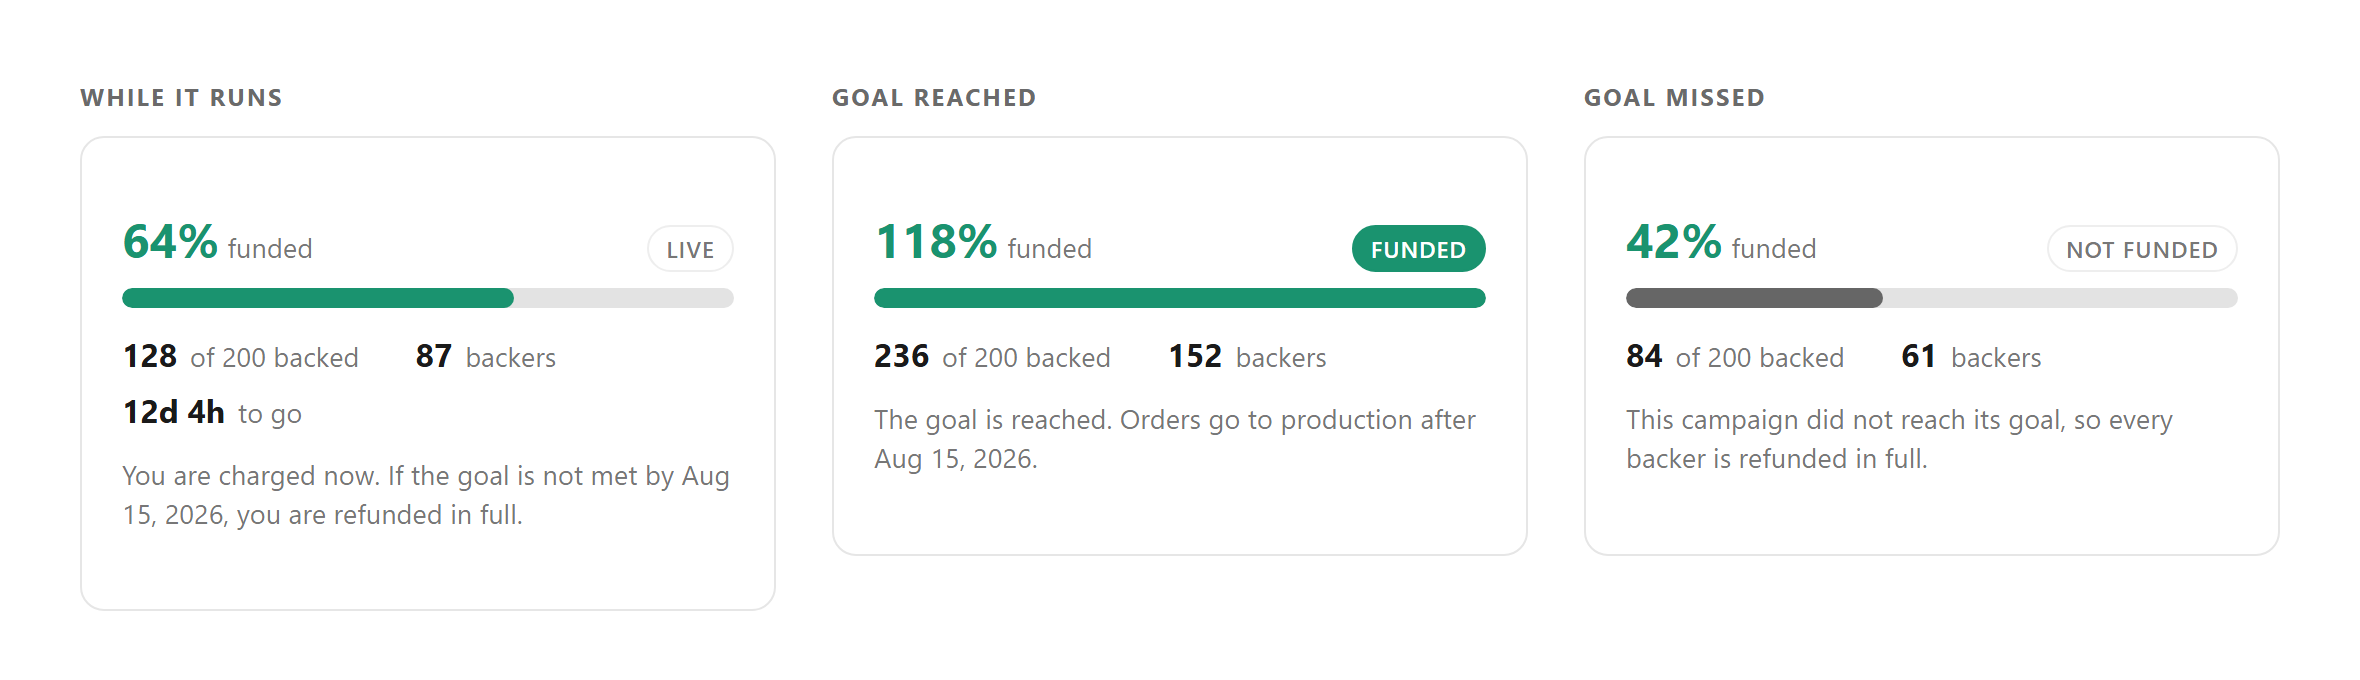
Every order containing the product counts automatically, including quick-buy and manual orders, so nothing depends on the buyer using a special button. The Campaigns table updates the progress bar and backer count, and each backer order is tagged Campaign Backer in your Orders list. When you hit your goal the status flips to Funded on its own. If you set a max cap, selling stops when it is reached.
9. Finishing the campaign
When the deadline arrives, click Resolve on the campaign row. If you hit the goal, mark it funded and go to production, the orders are already real and the money is already in your Shopify payouts. If you missed it, mark it failed and Fundcap opens the refund runner, which works through every backer order in small batches and refunds them in full through Shopify. Read the detail in what happens if a campaign misses its goal.
Either way you can export your backers as a CSV at any time with the CSV button. Those are your customers, on your store, so the list is yours to keep.
Fundcap is $19 a month flat with a 14-day free trial. No percentage of your raise and no per-order fees. If you get stuck on any step above, email support@fundcap.app and a human answers, usually well inside a day.